I’ve posted a few splashes recently and just before I put it all away so I could use the table for something else I decided to take a few pictures of the set-up for a future blog post. It’s not my intention to write a tutorial, I’m still learning and watching/reading tutorials myself, but just to show what I use for those who might be interested.

The basic kit is not exactly cheap but then again given the amount of money photographers spend on owning the latest camera bodies and lenses it is not too extravagant a purchase to give your photography another outlet. I sometimes wonder how many photographic trips I might have embarked upon if I hadn’t bought and sold kit so often in the past.
I guess it should be said also that the kit has minimal uses apart from releasing drops of water so unless you feel you are going to get plenty of use then you may want to consider whether you want to incur the cost. I had played with more Heath Robinson set ups previously so had a basic interest. I also enjoy playing with flashes and solving the myriad problems, creative and practical, that are involved when working indoors with small flashes. Over time some of the solutions evolve and I purchase items specifically to address problems that have had somewhat cruder solutions. For example I ordered some white sticky-backed plastic today to line the large tray I use to catch stray water and in which the rest of my set-up sits. The black tray creates a lot of darker shadows in the water so I’ve been using a white towel under the water bath to mitigate against this. Having found a workable solution (white towel) to the problem (dark areas of water) I then came up with a more permanent solution. Problem solving is one of the aspects of this type of photography that keeps me interested.

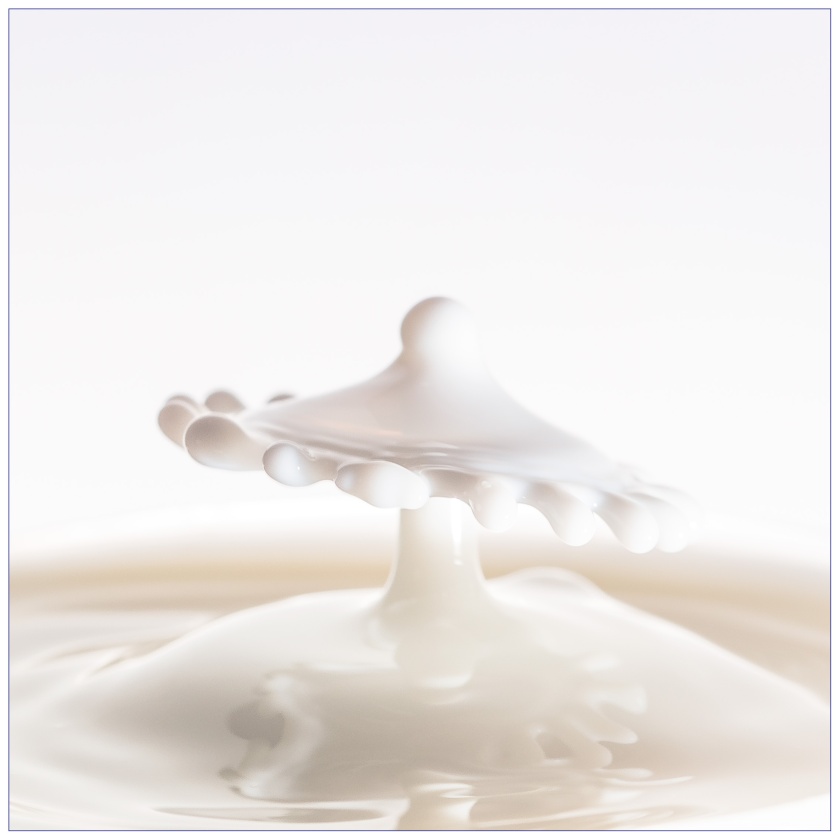
I’ve mentioned in a previous post that plain water is not the easiest liquid to use but it is currently my preferred solution for two reasons; availability and also whilst I’m learning I think it helps to have some consistency. That’s not to say I am not going to try other liquids but for now this is one variable that I can keep consistent whilst I learn. I will certainly be playing with other liquids though, I did have a try with some milk when I first bought the kit but quickly decided to stick with water whilst I learnt the basics. But that is just me, others may find milk for example easier than water.
One thing not provided in the kit but without which this type of photography is extremely problematic is a flash unit or two. To create the burst of light required to freeze the motion of the drops requires that the set up is lit with a flash. Flash units can be bought fairly cheaply these days and of course unlike the SplashArt kit have plenty of uses apart from water art. I initially purchased a cheap, generic flash unit to use alongside the Nikon flash that I already owned. This was quickly complemented by a second cheap unit and in April 2017 when I bought the kit this was my set up. More recently I have taken to using the Nikon macro flash kit as the units are smaller and easier to use in a confined space. The bigger flashes offer more power but I’ve not yet found any downside to using the smaller units; they were not bought for this project however and the cheap, generic flash units did a great job too. It’s not what you’ve got it’s what you do with it could be the watchwords here.

Because the process can be fiddly, especially during the iterative process of getting the timings right for the release of the second drop and then then triggering the camera I like to keep everything to hand and often have a stool to sit on (old age comes with some perks). Care needs to be taken to ensure this stays dry though and it is fortunate that the cables supplied are a good length, arguably much longer than needed but this is a benefit.
The principles are very easy. One button controls the size of the first drop of water, another the delay between first and second drop and a third to control the size of the second drop. A fourth button, set below the others, controls the timings for releasing the shutter, the unit being attached to the camera’s cable release socket. The fifth, ridiculously tiny in my view, button has a dual function as it is used to toggle between one drop or two and is also used to trigger the unit. It is very easy to understand but can at times be very fiddly to get just right. The trick is only changing one variable at a time in my experience. The process is however not for those with limited patience!


So, there you have it. A quick tour of my set up and a few thoughts on the process. Given time I will probably try to write more of a tutorial but for now this will have to suffice.

You must be logged in to post a comment.